Tailgate attachment
Jill shows us how to fix a tailgate that has lost its buoyancy.
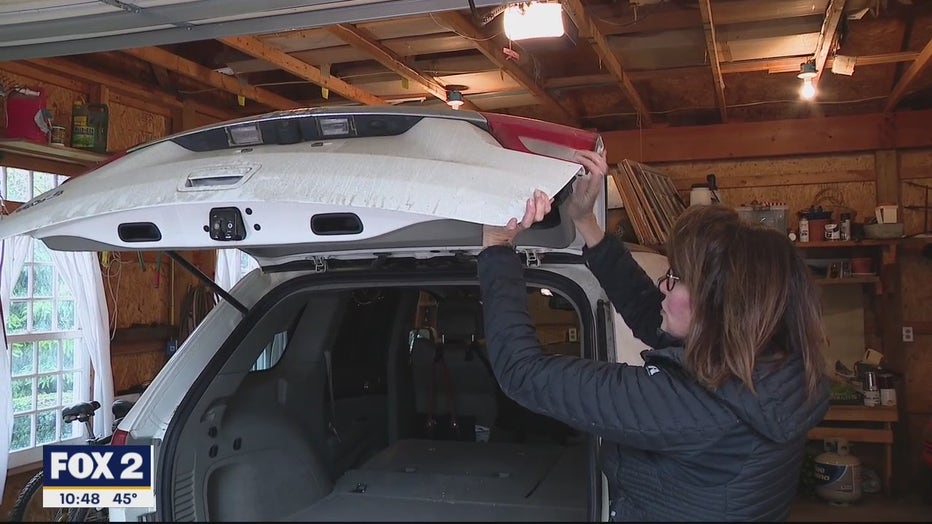
This week, Jill Washburn, our Jill of All Trades, shows us how to maintain and / or replace the hydraulic struts that hold the hatches and sometimes the trunks of many vehicles.
Over time, these spacers can dry out, clog with road debris, or simply wear out completely. They are actually quite easy to care for. And if you need a replacement, you can do it yourself too. They are really very affordable and the solution is quick.
How to determine if your tailgate legs need replacing.
How do you know if your struts have failed? Well, if they're still holding the hatch or tailgate, they're probably still fine, says Jill. Even if they don't go all the way up, as long as they hold on, he said, you're in good shape.
In Jill's case, the tailgate stopped before it was fully raised. Jill thought they didn't need replacing as much as a little attention. Most likely, they will need cleaning and relubrication. Jill started with the little ball joints at each end of the strut where they join the vehicle.
How to detach the tailgate legs from your vehicle.
advertising
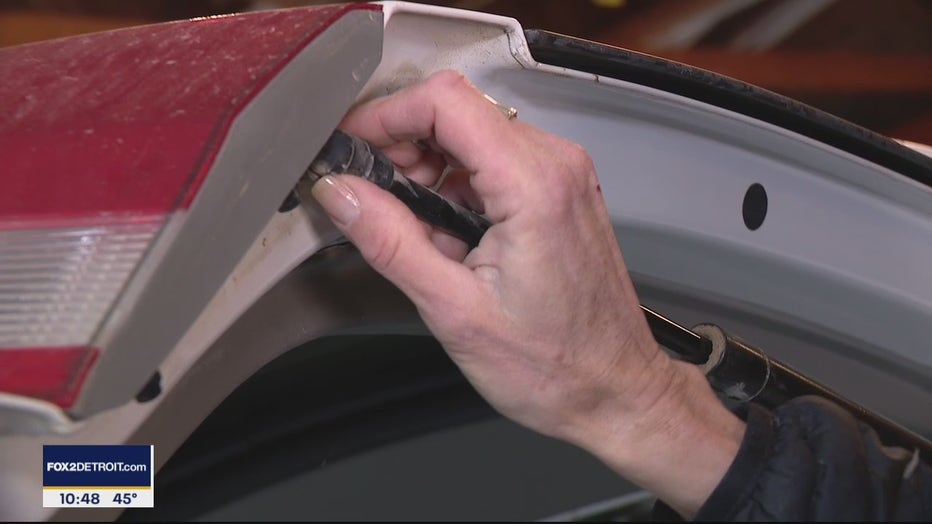
To release them, you may need to loosen a screw attachment or loosen a spring clip. Jill's vehicle (2011 Grand Cherokee) had a clip on it. He used a small flat-bladed screwdriver to loosen the clip a little. Then he used needle-nose pliers to pry it out of the joint. Keep an eye on the clip, says Jill. You'll need to put it back in when you're done.
Once that was done, he used the needle-nose pliers again to move the joint.
**** TO BE PREPARED ****
You must have the tailgate open or have someone hold it as the tailgate will fall as soon as you remove one end of the tailgate. Tailgates and hatches are heavy, and one strut is not enough to hold one open. You don't want it to fall on your head or pinch your fingers. Removing the other end of the strut should be the same process. Of course, if you were to replace the strut you would simply reverse this process and mount your new strut now.
I'll show you how to clean the ball joints where the strut meets your vehicle.
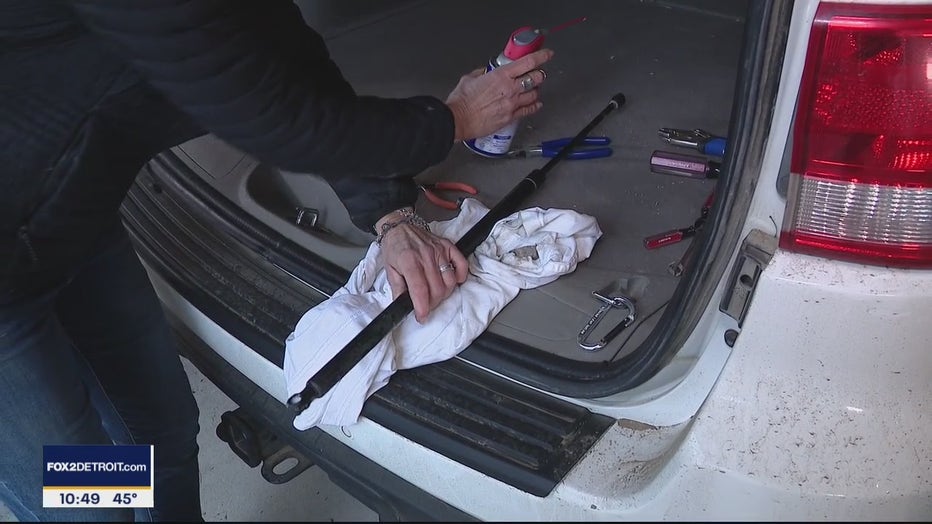
If you're just waiting for it, your focus will be on cleaning the existing strut. Once you've completely removed it, Jill says, spray some WD-40 on the ends of the strut bushing and clean them with a rag. They are most likely quite dirty, and cleaning them will make the joints easier to move. Also, spray some WD-40 on the ball joints and wipe them off. More of a mechanical cleaner than a lubricant, WD-40 is perfect for these types of tasks. It also prevents water from entering.
When the joint ends are freshly cleaned, reattach the strut by placing the gland ends over the ball ends of the joints and secure them with the spring clip or screw bracket that you originally removed. Spring clips can be a little snotty, says Jill, to come back. You may need to use a screwdriver (or two) or needle-nose pliers to open them and snap them back into place. Jill recommends wearing gloves for this part to avoid pinching your fingers.
Once the strut is restored, it's time to look at the point where the rod enters the hydraulic piston section of the strut. This is a place where silt and dirt can build up, especially if you drive a lot of dirt roads like Jill. Dirt only finds one way. The jills were covered with packed earth. Once again, Jill used the small screwdriver and carefully pried the dirt off the joint. Once the dirt was gone, he wiped it off with a rag and applied a light lubricant. A 3 in 1 oil would work. Jill used Tri-Flow, which she also uses for bicycle chains, so she already had it in her store.
Jill says you may have to open and close the tailgate several times to help spread the lubricant. You may even need to reapply the oil right away to make sure you have enough to cover the dipstick while working on the tailgate. After this process, Jill immediately noticed that her back door worked more smoothly and fully extended, which hadn't happened in a while.
So you are on the right track for a better tail lift and you can potentially avoid going to the dealership or store.
PROJECT EVALUATION: Simply +
Click the video player above to see Jill walk you through the process.
Aucun commentaire:
Enregistrer un commentaire